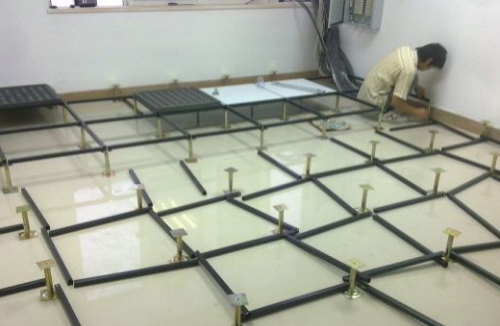
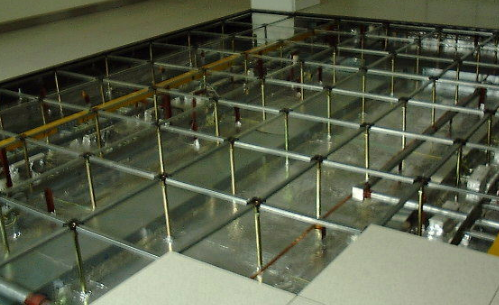
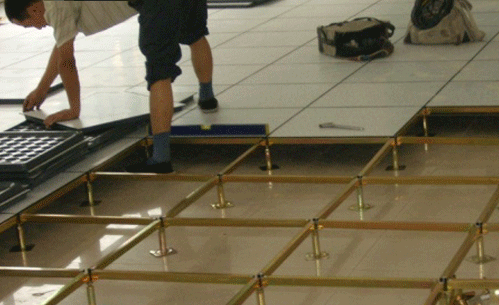
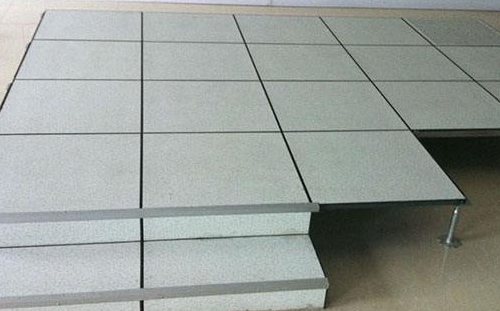
Anti-static floor is a kind of floor decoration material. It is generally more common in computer rooms or laboratories. Many people do n’t know much about anti-static floor paving methods. The following editors will briefly introduce how to lay anti- static floors . What are its requirements for paving, let's take a look! Anti-static floor what shop 1. If there is no equipment such as a control cabinet in the laying room, and the geometric dimensions are in accordance with the number of raised floor modules, its laying method should be laid from the inside out. 2. If the indoor size does not meet the number of modules, you should find the center point of the indoor two directions, and see how much the size is different. If the difference is not obvious, then lay it outwards and inwards. If the difference is large, then it is necessary. Make a symmetrical division and lay it from the inside out. 3. If there are holes in the indoor floor, the laying direction and sequence of the anti-static floor should be considered comprehensively. 4. The laying height of anti-static floor should be determined according to the design requirements. 5. Install fixed brackets and beams: Talk about the elevation control lines on the indoor wall and ground lines, and then install the adjustable brackets according to the elevation control lines drawn around the indoor wall and the good grid positions on the base surface. After finishing, install the crossbeam, adjust the height of the bracket with a small line and a horizontal ruler, the height of the whole house must be the same, then level the supporting nut, and then tighten it to form a networked bracket. 6. Laying of raised floor: adjust the height of the laying level to ensure the four-corner contact is flat. When the raised floor block does not meet the modulus, the deficiencies can be cut and trimmed according to the size, and the corresponding adjustable brackets and beams are equipped. 7. Anti-static grounding: The grounding connection shall be made after the installation of the movable floor, and its technical performance shall comply with the construction acceptance specifications and design requirements. Anti-static floor paving requirements 1. First apply conductive adhesive to the ground with a scraper. When the conductive adhesive feels sticky or non-sticky, start laying the floor. When laying the anti-static floor, start from the middle to the surroundings, tap with a rubber hammer while sticking, and maintain a distance of 1.5-2.0mm between the floor and the floor . 2. While laying the floor, it must be ensured that the copper foil can pass under the floor. Then use a welding gun to soften the electrode at high temperature to fill the gap between the floor and the floor. The protruding part of the electrode should be cut off with a utility knife, and the surface can be cleaned after the entire ground construction is completed. Editor's summary: The above is about how to lay anti- static floor and the requirements for laying static floor. Through the above, everyone also knows how to lay anti- static floor . You can refer to the above methods and hope to help everyone. What, the decoration still uses his own money? ! The Qi family is decorated in installments, with an ultra-low annual interest rate of 3.55% and a maximum loan of 1 million. Apply now to enjoy the discount If you are interested in brand cooperation, content cooperation, and advertising of this website, please send an email to :. How to lay static floor Red light can promote the development of flowers and fruits of plants, and can make the fruits of plants more full and sweet. In addition, red light can also promote the formation of proteins and enzymes in plants, and can effectively improve the photosynthesis efficiency of plants. Use red Led Grow Light for marijuana, it will be helpful to yield bigger flower. Led Grow Light Red,Led Grow Light For Flowering,Indoor Plant,Led Grow Light Red Blue GuangDong One World High-tech Co., Ltd. , https://www.mkdlights.com


