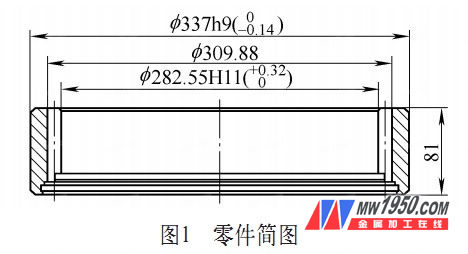
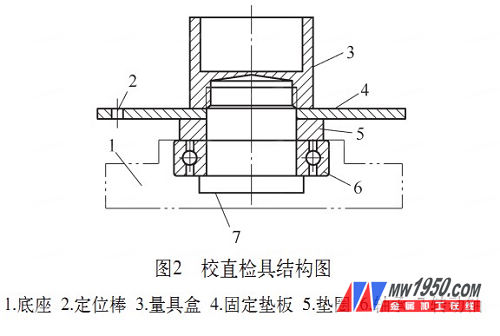
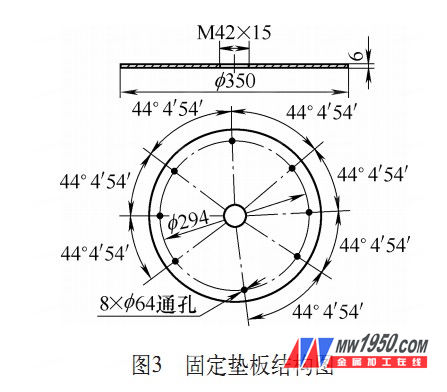
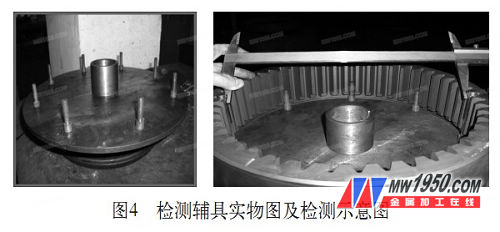
The material of the large speed gear ring (see Figure 1) produced by our company is 20CrMnTi steel. The technical requirements are carbonitriding treatment: the depth of the hardened layer is 1.1-1.5mm, the surface hardness is 58-64HRC, and the core hardness is 29-45HRC. Because the company has no quenching special equipment such as quenching press, and the part has thin wall and large diameter (337mm), the deformation after carbonitriding quenching is large, and the pass rate of roundness is only 20% (according to 0.3mm roundness). Therefore, a large number of parts need to be calibrated to meet the requirements. When measuring the M value first, the method of measuring the rod with grease is used. However, since the number of teeth is large (49 teeth), it is basically necessary to measure several teeth in order to measure and the measuring rod is large (φ 10mm). The grease is not fixed firmly and often falls off. Someone needs assistance to complete the measurement. In the post-heat correction, multi-azimuth detection is required to find the maximum and minimum values ​​of the ring gear deformation. When the M-value and labor cost are measured by the method of the number of teeth and the grease metering rod, the measurement efficiency is very low, and improvement is urgently needed. To this end, we have designed a test aid that specifically detects the M value (see Figure 2), which greatly improves the efficiency of the diagram of the fixed pad diagram of Figure 3 and shortens the calibration cycle. The gauge plate is slightly larger than the outer diameter of the ring gear. The most important thing is to design the positioning hole on the fixed plate. If the ring gear is an even number of teeth, it is only necessary to divide the circumference 8 equally on the index circle; If the ring gear is an odd number of teeth, you need to calculate the specific method: first calculate the angle corresponding to each tooth by dividing 360° by the number of teeth, and then divide it into 8 parts (there is one more tooth), as shown in Figure 3. Show. With the newly designed test aid (see Figure 4), the M value of the 8 points (4 directions) of the ring gear can be accurately measured. No need to count the teeth, the machine will be automatically aligned, and the measuring rod will be placed directly on the support column. Grease can be measured. When measuring, it can be rotated freely, and the operation is convenient and fast. Since the measurement orientation is large, the high and low points of the ring gear deformation can be quickly found, which provides a basis for correction, greatly improves the measurement efficiency, shortens the calibration period, and ensures the product quality. Pu Faux Stone Panels,Artificial Polyurethane Pu Foam Stone,Pu Foam Stone Pu Cultural Stone,Easy Installation Artificial Stone Shandong Zeen Decoration Material Co., Ltd. , https://www.zeendecor.com


