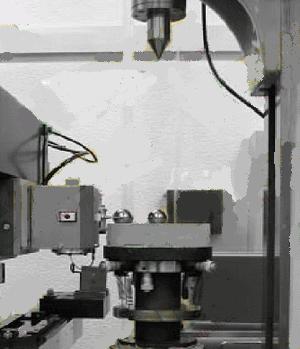
Foreword In order to ensure the quality of the gear, the accuracy of the measured gear shape must be traceable. Therefore, a traceable calibration of the gear gauge is required using the reference template. As a template (especially the reference mother model), its shape must be very precise, easy to use on the gear measuring instrument, and can be tested and certified by the national metrology institutes of various countries. The calibration of the gear measuring instrument involute tooth profile measurement accuracy usually uses an involute model. But there are the following problems: Accuracy: The most accurate involute template still has a deviation of about 0.3 μm, which is not accurate enough for the parent reference. Surface roughness: The preparation process of the involute helix panel is difficult to achieve a surface roughness (peak-to-peak) of less than 0.5 μm. Sensitivity: The idle travel of the gear gauge output is difficult to detect. Traceability: No national metrology institute can verify the traceability of the three-dimensional shape accuracy of the involute helix. For a long time, gear engineers have understood the above problems and tried to replace the involute template with a cylindrical pin or a flat template with a higher shape accuracy. But their joint efforts have not been successful so far, for the following reasons: Figure 1 Using the DBA sample calibration gear measuring instrument When measuring a cylindrical pin or a flat template, the output signal of the involute checker easily exceeds the range. Even in the absence of error, the calibrated output curve is not a straight line, which makes the calibration of the calibration data extremely difficult. At the time of calibration, the deviation of the output signal is not directly related to the gear accuracy items (such as pressure angle deviation, tooth profile deviation, etc.). The measurement output is very sensitive to the mounting error of the template on the meter. Even with high-precision cylindrical pins or flat plates for making prototypes, the evaluation of the three-dimensional shape accuracy of the templates is still very difficult. During the shape measurement process, the contact point of the stylus ball is varied. Tooth profile Figure 1 shows a double ball model (DBA) mounted on a calibrated gear gauge. The two-ball model is the benchmark for involute tooth profile calibration. The mounting error of the model on the gear measuring instrument is minimized by measuring the "centering ball". By replacing the cylindrical pin with a precise "shape detection ball", the difficulty of item (4) above is avoided because the diameter of the ball does not change due to the different mounting state on the main body of the template (and the cylindrical pin is skewed if installed) Will affect the measurement accuracy - translation. We hope to use Kondo's theory to avoid the difficulties of item (3) above. A detailed analysis of the theory also shows that the difficulty of item (1) above can be avoided by using a spherical template of appropriate size. Figure 2 shows the theoretical curve of a properly designed DBA double-ball model measured with an involute detector, called the TCB curve (theoretical hump curve). The template produces two identical peak heights. Figure 2 Hump curve for involute detection Next page
A Basin Faucet (also spigot or tap: see usage variations) is a valve controlling the release of a liquid that enabling washing and drying in the bathroom.
Basin Faucet,Minimalist Basin Faucet,Basin Faucet For Bathroom,Wall Mounted Mixer Basin Faucets Kaiping Jenor Sanitary Ware Co., Ltd , https://www.kpjenorsanitary.com